The next time a recipe calls for pumpkin puree, why not make your own? Sure, canned pumpkin is convenient, but it can’t compare to the sweet, complex flavor and creamy texture of homemade. What’s more, preparing homemade pumpkin puree is as easy as making any other vegetable puree. In fact, it may even be easier, since it requires no peeling, chopping, or blending, as you’ll see in this four-step guide. All the steps outlined here will also work for making your own pureed squash.
Step 1: Pick the right pumpkin (or squash).
For pumpkin puree that is sweet, smooth, and packed with flavor, choose pumpkins that have been grown for cooking, not decorating. Look for small sugar pumpkins and pie pumpkins that have thick walls of dense, bright-hued flesh and low moisture content. Heirloom varieties like Dickinson, Cinderella (Rouge Vif d’Etampes), and Fairy Tale (Muscade de Provence) pumpkins are excellent choices as well, though they may be a little large for just one recipe.



The Spring 2025 magazine is here!
Our gorgeous “bookazine” features over 80 fresh and tasty recipes.
And don’t forget winter squash! Pumpkin-shaped kabocha and red kuri squash have smooth, dense, nutty flesh that purees well. And butternut squash is an excellent year-round alternative to fresh or canned pumpkin. The taste and texture of butternut squash is very similar to pumpkin, and butternut squash puree can be used in any baking recipe that calls for pumpkin puree
Step 2: Halve and seed it.
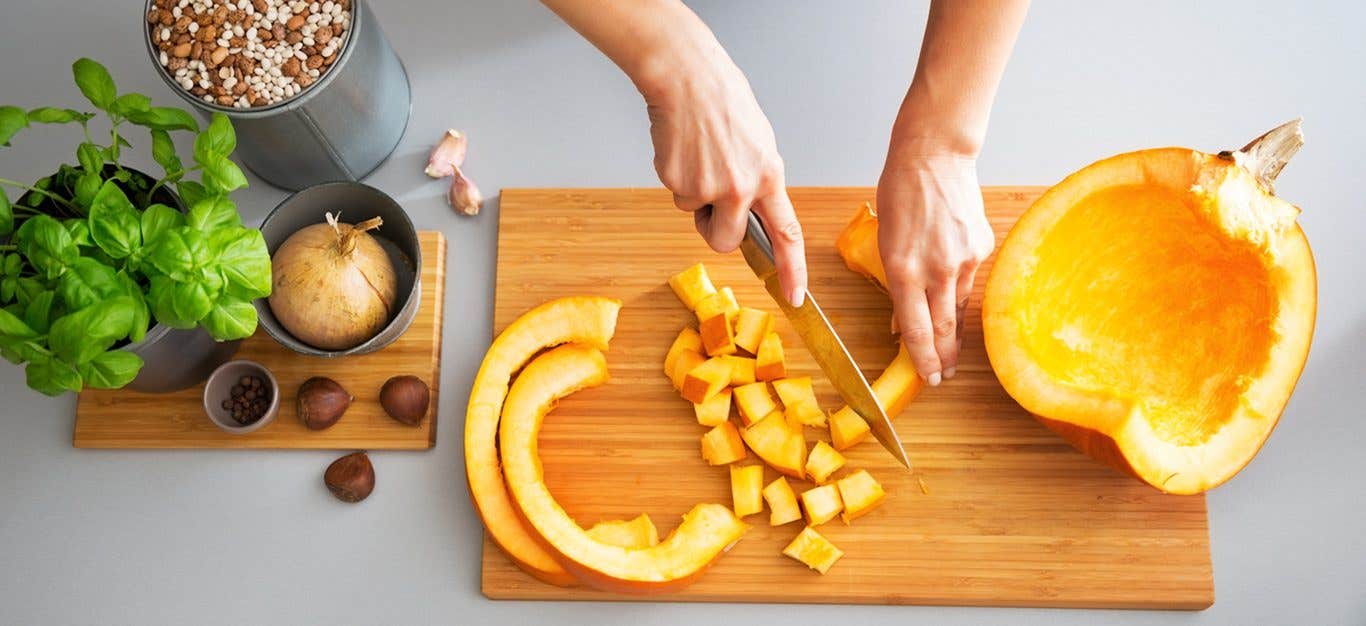
Remove the pumpkin stem, then slice off a small piece from the bottom of the pumpkin so it will stand flat on a cutting board. Carefully split the pumpkin in half lengthwise, and use an ice cream scoop or large spoon to remove the seeds and stringy flesh from the pumpkin’s cavity.
The Microwave Trick: One trick for making it easier to cut a small pumpkin is to soften it in the microwave. Simply prick the pumpkin all over with a fork, place it whole in the microwave, and cook on high power 5 minutes. Let the pumpkin cool at least 10 minutes before halving; the interior can get very hot.
Step 3: Cook the pumpkin/squash.
The one thing you don’t want to do when making pumpkin puree? Cook the pumpkin in boiling water. Boiling pumpkin and winter squash can saturate the flesh with moisture and make it soggy and tasteless. The best way to cook pumpkins for puree is to roast or steam them. Here’s how.
Roasting Method
Preheat the oven to 400˚F, and line a baking sheet with parchment paper. Place the seeded pumpkin halves cut side down on the baking sheet, and roast 30 to 45 minutes, or until the pumpkin halves feel soft when pressed.
Steaming Method
You can steam fresh pumpkin for puree three different ways: on the stovetop, in an Instant Pot, or in the microwave.
Stovetop: Fill a large saucepan with ½ inch water and place a steamer basket inside. Cut the pumpkin halves into large pieces that will fit in the steamer basket. Cover and steam the pumpkin over medium-low heat 25 to 30 minutes, or until the flesh feels soft when pierced with the tip of a knife.
Instant Pot: Set a steamer rack or wire rack in the bottom of the Instant Pot. Add 1½ cups water. Cut the pumpkin halves into large pieces and arrange them in the multicooker. Seal and cook on high power at high pressure for 15 minutes. Allow the pressure to release naturally.
Microwave: Pour ½ cup water in the bottom of a microwave-safe baking dish. Cut the pumpkin into large pieces that will fit in the dish. Cover the dish tightly so no steam escapes. Microwave on high power for 10 to 15 minutes or until the flesh is soft and tender.
Step 4: Mash it.
Cool the roasted or steamed pumpkin until it's easy to handle; then scoop out the flesh from the skin shells with an ice cream scoop or large spoon. Discard the skins, and mash the cooked pumpkin into a smooth puree with a fork or a potato masher. (For large batches or extra-smooth puree, you can also use a blender or food processor, but it isn’t usually necessary.)
Troubleshooting
Homemade pumpkin puree should be thick and creamy—not watery, stringy, or lumpy. Here’s how to fix a batch that needs thickening or smoothing out.
Too Watery
The moisture content of pumpkins and winter squash can vary widely from variety to variety. how and where it was grown, and when it was harvested. If a batch of pumpkin puree appears thin or watery, let it drain in a fine-meshed strainer for 1 hour to remove excess liquid.
Too Lumpy
Most roasted or steamed pumpkin just needs a quick mash to turn soft and creamy-smooth. If lumps remain, place the puree in a blender or food processor, and blend until smooth.
Too Stringy
When steamed or roasted pumpkin flesh remains stringy after mashing or blending, press it through a sieve or food mill to remove any stringy fibers.
How to Use and Store Pumpkin Puree
To use fresh pureed pumpkin or squash in place of canned, count 1¾ cup puree per 15-oz. can of pure, solid-pack pumpkin or squash.
Fresh squash or pumpkin puree will keep 3 days in the fridge and up to 6 months in the freezer.
Can You Freeze Pumpkin Puree?
Yes, you can! Freezing is a great way to stock up on fresh pumpkin puree in the fall, when tasty cooking and heirloom varieties are readily available. It also lets you save leftovers when the yield from a large pumpkin is more than you need for a recipe.
We recommend freezing pumpkin puree in ready-to-use batches. To do so, line a baking sheet with parchment paper, then scoop ¼-cup mounds of cooked, mashed pumpkin puree onto the parchment. Freeze until the mounds are solid, then transfer them to a resealable container. Whenever a recipe calls for a can of pumpkin or butternut squash, just take out the amount called for. (One 15-oz can translates to seven ¼-cup mounds.) Smaller dollops will thaw faster than large amounts.
Related News
Get Our Best Price On The Forks Meal Planner

Forks Meal Planner takes the guess work out of making nutritious meals the whole family will enjoy.
SAVE $200 ON OUR ULTIMATE COURSE
Join our best-selling course at a new lower price!

